Sunday, March 22, 2009
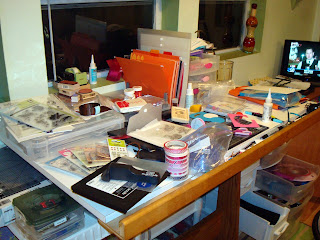
The aftermath of card day
So after card making day is over, and I'm tired. Guess what's left? A HUGE MESS! And yes, I made all that mess. Amazing how much stuff it takes to make cards, huh? That's not even everything I used. I did put stuff away as I went along. I had stuff in the floor and on my other table too, but I didn't want you to think I'm a complete slob! Haha..
I did clean it up, as it will be ready for me to mess up again soon. :)
And some more...
And yet some more cards! They just keep coming huh? Sorry about the fuzzy pics! I need to re-shoot in daylight and get the sun on them. The monkey birthday isn't finished yet. He's a work in progress. :) Sock Monkey (c) Stampin Up!; Birds Inkadinkadoo/Hello sentiment, stampendous; Bunny Love, Close to My Heart
More cards
Card Day!
I made a mess today! I had a creative streak. I have had crafter's block for a while, and just stumped on any ideas for anything! Today...that block was gone! I did mostly "clean and simple" cards. Some of them I am donating to troops to send out for Mother's day. A couple are Easter cards, and one or two might show up in a contest... Zoo Animals, Technique Tuesday; Bird/Life is Sweet, Prima Marketing; Mother's day sentiment, unknown
Quilled Birthday
Sunday, March 15, 2009
Picasa
WOW! I just found Picasa through Google to edit photos. AMAZINGLY SIMPLE! I never did get the other photo editing programs because there was so much stuff, and seemed so overwhelming! I got picasa to do watermarks on my card photos, and was playing around with an old photo to get the hang of it. So far, I'm liking it!
Thursday, March 5, 2009
Queen for a day!
I had a thought in my head that was so vivid, I had to follow through! This is the result! And it didn't take me long to put it all together. I liked the result! This was for my friend for her birthday. The cards are mini playing cards, I crinkled them in the paper crimper, distressed all the cards and papers with chalk black ink and Stampin up Basic Black. I used the cuttlebug argyle embossing folder and ran the ink over the raised parts. Attached some ribbons, brads and clear square buttons, and voila!
Subscribe to:
Posts (Atom)